MrKill4Game (talk | contribs) No edit summary |
Tag: Visual edit |
||
| (31 intermediate revisions by 6 users not shown) | |||
| Line 1: | Line 1: | ||
| − | While at first The Culling's map might seem large, once you understand it, it is not nearly as daunting. |
+ | While at first The Culling's map might seem large, once you understand it, it is not nearly as daunting. Learning the map is an important skill to have, as it will give you an advantage over your opponent. |
| − | == |
+ | == Map Overview == |
| + | [[File:mapcullmunity.png|600x600px]] |
||
| − | (Note: These maps are community made and are not perfect, but they are more than enough to get an idea of the map. These maps also don't display the newer building that was added behind Culco Gas East.) |
||
| + | == Map Objects == |
||
| − | === <font color="#b30000">Simple Map</font> === |
||
| + | ''Map Objects'' are objects that spawn around the island which are used for a large variety of things. |
||
| − | This is a simple, easy to read map. It shows the general map layout, without being overly complicated. |
||
| + | ===== <font size="3">Crafting</font> ===== |
||
| − | [[File:Map1.jpg|thumb|none|This is a simple, easy to read map. It shows the general map layout, without being overly complicated.|500x500px]] |
||
| − | |||
| − | <br> |
||
| − | |||
| − | === <font color="#b30000">Advanced Map</font> === |
||
| − | This is a more detailed version of the map, showing the positions of more items than the previous map. |
||
| − | |||
| − | [[File:Map2.png|thumb|This is a more detailed version of the map, showing the positions of more items than the previous map.|left|500x500px]] |
||
| − | |||
| − | <mainpage-leftcolumn-start /> |
||
| − | |||
| − | == <font color="#b30000">Map Objects</font> == |
||
| − | ''Map Objects ''are objects that spawn around the island which are used for either crafting or obtaining items. |
||
| − | |||
| − | === <font color="#b30000">Crafting</font> === |
||
* [[Branch]] |
* [[Branch]] |
||
* [[Rock]] |
* [[Rock]] |
||
| Line 28: | Line 14: | ||
* [[Explosive Barrel]] |
* [[Explosive Barrel]] |
||
| − | === <font |
+ | ===== <font size="3">Item Spawners</font> ===== |
* [[Locker]] |
* [[Locker]] |
||
* [[Medicine Cabinet]] |
* [[Medicine Cabinet]] |
||
* [[Refrigerator]] |
* [[Refrigerator]] |
||
* [[Toilet]] |
* [[Toilet]] |
||
| − | * [[ |
+ | * [[Green Crate|Item Crate]] |
* [[Crates|Explosive Crate]] |
* [[Crates|Explosive Crate]] |
||
| + | * [[Blue Crate]] |
||
| − | * [[Holo Spawners|Holo Spawner]]<br> |
||
| − | == <font color="#b30000">Buildings</font> == |
||
| − | There are 19 ''buildings'' in The Culling placed for our looting pleasure. Every building is vastly different, on both their appearances and lootable objects. This list will start at the most northern building, and move clockwise until all buildings have been listed. |
||
| − | === <font |
+ | ===== <font size="3">Recycle Station</font> ===== |
| + | ''Recycle Stations'' are blue machines at buildings that allow you to recycle [[Items/Traps|Items]] and [[weapons]] and turn them into [[F.U.N.C.]]. The amount of [[F.U.N.C.]] you will be rewarded with depends on how good them [[item]] or [[weapons|weapon]] is. Just like the medical station, you have to look at the recycling station while using it. This along with it being very noisy for both you and other contestants makes you very vulnerable for sneak attacks. |
||
| − | [[File:Culcast Sat Com.jpg|thumb|none|Culcast Sat Com|320x180px]]<mainpage-endcolumn /> |
||
| + | |||
| + | ===== <font size="3">Medical Station</font> ===== |
||
| + | ''Medical'' ''Stations'' are red machines at buildings that allow you to heal in exchange for [[F.U.N.C.]]. It will heal you 4 health for 1 [[F.U.N.C.]] at a rate of once per second. This makes it much faster than [[crafting]] [[Crafted Bandage]] heal, but is also much more expensive. Just like the recycle station, you have to look at the medical station while using it. This along with it being very noisy for both you and other contestants makes you very vulnerable for sneak attacks. |
||
| + | |||
| + | ===== <font size="3">Airdrop Pad</font> ===== |
||
| + | ''Airdrop Pads'' are pads scattered around the island where you can call in your [[airdrops|airdrop]]. They have predetermined spawn locations, and each location has a chance to spawn each game. [[Airdrops]] will take 45 second to land (15 seconds with [[perks#Utility|Load Dropper]] perk equipped), but they can be shot down early with a ranged [[weapons|weapon]] or by throwing an object at it. Contestants must also be wary of opponents when calling in their [[airdrops|airdrop]], because they are very noisy, which may attract other contestants who may want to steal it. |
||
| + | |||
| + | ===== <font size="3">Trap Bridge</font> ===== |
||
| + | ''Trap Bridges'' are very dangerous bridges that hang very high up and connect two cliffs together. They are dangerous because the floors drop when they take damage, causing any contestants on them to fall from a great height, taking massive damage because of it. This allows other contestants to either knock their opponents off, or trap them in the middle which is the only solid ground on the bridge. Trap bridges however do have special airdrop pads on them as well, which will spawn contestants' [[airdrops]] to spawn directly overhead, allowing them to receive their airdrops extremely quickly. This however is a great risk, because if any opponents are nearby, they can hear the [[airdrops|airdrop]] and come to trap them on the bridge. |
||
| + | |||
| + | <br> |
||
| + | |||
| + | == Map Events == |
||
| + | ''Map Events'' are random events that take place twice during the course of a match. The first event takes place at the 19:15 mark, while the second event doesn't occur until 13:00. These events are designed to draw players together to encourage fights and spice up the game play. These events take a few different forms, each with their own unique announcements and themes. |
||
| + | |||
| + | You can read more about them [[Map Events|here.]] |
||
| + | |||
| + | <br> |
||
| + | |||
| + | == Buildings == |
||
| + | There are 19 ''Buildings'' in The Culling placed for our looting pleasure. Every building is vastly different, on both their appearances and lootable objects. Each building (besides the Mini Sewers) will have at least 1 Recycle Station and Med Station. This list will start at the most northern building, and move clockwise until all buildings have been listed. |
||
| + | |||
| + | === Culcast Sat Com === |
||
| + | [[File:Culcast Sat Com.jpg|thumb|none|Culcast Sat Com|320x180px]] |
||
| + | (Note: Lockers in Culcast Sat Com have a reduced spawn rate due to the high amount of lockers) |
||
Culcast Sat Com contains: |
Culcast Sat Com contains: |
||
| − | * 26 - [[ |
+ | * 26 - [[Locker]]s |
* 10 - [[Locker|Double Lockers]] |
* 10 - [[Locker|Double Lockers]] |
||
* 1 - [[Refrigerator]] |
* 1 - [[Refrigerator]] |
||
| − | * 6 - [[Toilet |
+ | * 6 - [[Toilet]]s |
| − | * 1 - [[Medicine Cabinet |
+ | * 1 - [[Medicine Cabinet]]s |
| − | (Note: Lockers in Culcast Sat Com have a reduced spawn rate due to the high amount of lockers) |
||
<br> |
<br> |
||
| − | === |
+ | === Culpepper Outfitters === |
| − | |||
[[File:Culpepper Outfitters.jpg|thumb|none|Culpepper Outfitters|320x180px]]Culpepper Outfitters contains: |
[[File:Culpepper Outfitters.jpg|thumb|none|Culpepper Outfitters|320x180px]]Culpepper Outfitters contains: |
||
| − | * 9 - [[ |
+ | * 9 - [[Locker]]s |
* 17 - [[Locker|Double Lockers]] |
* 17 - [[Locker|Double Lockers]] |
||
* 3 - [[Refrigerator]] |
* 3 - [[Refrigerator]] |
||
| − | * 2 - [[Toilet |
+ | * 2 - [[Toilet]]s |
| − | * 3 - [[Medicine Cabinet |
+ | * 3 - [[Medicine Cabinet]]s |
| + | |||
| + | <br> |
||
| + | |||
| + | === Tunnels (or Long Hall) === |
||
| + | [[File:Tunnel.jpg|thumb|none|Tunnels|320x180px]]The Tunnels contains: |
||
| + | * 10 - [[Locker]]s |
||
| + | * 7 - [[Locker|Double Lockers]] |
||
| + | * 0 - [[Refrigerator]] |
||
| + | * 0 - [[Toilet]]s |
||
| + | * 0 - [[Medicine Cabinet]]s |
||
| + | |||
| + | <br> |
||
| + | |||
| + | === Water Treatment North === |
||
| + | [[File:Water Treatment North.jpg|thumb|none|Water Treatment North|320x180px]]Water Treatment North contains: |
||
| + | * 13 - [[Locker]]s |
||
| + | * 7 - [[Locker|Double Lockers]] |
||
| + | * 0 - [[Refrigerator]] |
||
| + | * 0 - [[Toilet]]s |
||
| + | * 3 - [[Medicine Cabinet]]s |
||
| + | |||
| + | <br> |
||
| + | |||
| + | === Water Treatment South === |
||
| + | [[File:Water Treatment South.jpg|thumb|none|Water Treatment South|320x180px]]Water Treatment South contains: |
||
| + | * 10 - [[Locker]]s |
||
| + | * 3 - [[Locker|Double Lockers]] |
||
| + | * 0 - [[Refrigerator]] |
||
| + | * 0 - [[Toilet]]s |
||
| + | * 2 - [[Medicine Cabinet]]s |
||
| + | |||
| + | <br> |
||
| + | |||
| + | === Sewers === |
||
| + | [[File:Sewers.jpg|thumb|none|Sewers|320x180px]](Note: The Sewers have multiple gates along the length of it, which can be knocked down by hitting them. These are useful when running from an opponent. They can also be very deadly when paired [[Gas Tank]]s that spawn inside of the sewers, allowing you to trap your opponent in the gas.) |
||
| + | |||
| + | The Sewers contain: |
||
| + | * 7 - [[Locker]]s |
||
| + | * 3 - [[Locker|Double Lockers]] |
||
| + | * 2 - [[Refrigerator]] |
||
| + | * 0 - [[Toilet]]s |
||
| + | * 2 - [[Medicine Cabinet]]s |
||
| + | |||
| + | <br> |
||
| + | |||
| + | === Culcast Weather and Observation === |
||
| + | [[File:Culcast Weather and Observation.jpg|thumb|none|Culcast Weather and Observation|320x180px]]Culcast Weather and Observation contains: |
||
| + | * 20 - [[Locker]]s |
||
| + | * 0 - [[Locker|Double Lockers]] |
||
| + | * 0 - [[Refrigerator]] |
||
| + | * 0 - [[Toilet]]s |
||
| + | * 1 - [[Medicine Cabinet]]s |
||
| + | |||
| + | <br> |
||
| + | |||
| + | === Culco Gas East === |
||
| + | [[File:Culco Gas East.jpg|thumb|none|Culco Gas East|320x180px]]Culco Gas East contains: |
||
| + | * 13 - [[Locker]]s |
||
| + | * 3 - [[Locker|Double Lockers]] |
||
| + | * 1 - [[Refrigerator]] |
||
| + | * 1 - [[Toilet]]s |
||
| + | * 1 - [[Medicine Cabinet]]s |
||
| + | |||
| + | <br> |
||
| + | |||
| + | === Outpost === |
||
| + | [[File:New Building.jpg|thumb|none|New Building|320x180px]] |
||
| + | Outpost contains: |
||
| + | * 13 - [[Locker]]s |
||
| + | * 4 - [[Locker|Double Lockers]] |
||
| + | * 1 - [[Refrigerator]] |
||
| + | * 0 - [[Toilet]]s |
||
| + | * 2 - [[Medicine Cabinet]]s |
||
| + | |||
| + | <br> |
||
| + | |||
| + | === Pump House === |
||
| + | [[File:Pump House.jpg|thumb|none|Pump House|320x180px]] |
||
| + | (Note: Lockers in the Pump House have an increased spawn rate due to the small amount of lockers) |
||
| + | |||
| + | The Pump House contains: |
||
| + | * 3 - [[Locker]]s |
||
| + | * 3 - [[Locker|Double Lockers]] |
||
| + | * 1 - [[Refrigerator]] |
||
| + | * 2 - [[Toilet]]s |
||
| + | * 1 - [[Medicine Cabinet]]s |
||
| + | |||
| + | <br> |
||
| + | |||
| + | === Culco Airport === |
||
| + | [[File:Culco Airport.jpg|thumb|none|Culco Airport|320x180px]]Culco Airport contains: |
||
| + | * 15- [[Locker]]s |
||
| + | * 13 - [[Locker|Double Lockers]] |
||
| + | * 1 - [[Refrigerator]] |
||
| + | * 5 - [[Toilet]]s |
||
| + | * 2 - [[Medicine Cabinet]]s |
||
| + | |||
| + | (Note: the airport also has 3 miniature buildings along the runway. These buildings have a 100% chance to spawn an [[Crates|item crate]] in one of them.) |
||
| + | [[File:Airport Mini Buildings.jpg|thumb|none|Airport Mini Buildings|320x180px]] |
||
| + | |||
| + | <br> |
||
| + | |||
| + | === Culcast Radio === |
||
| + | [[File:Culcast Radio.jpg|thumb|none|Culcast Radio|320x180px]] |
||
| + | (Note: Lockers in Culcast Radio have an increased spawn rate due to the small amount of lockers.) |
||
| + | |||
| + | Culcast Radio contains: |
||
| + | * 3 - [[Locker]]s |
||
| + | * 3 - [[Locker|Double Lockers]] |
||
| + | * 1 - [[Refrigerator]] |
||
| + | * 0 - [[Toilet]]s |
||
| + | * 1 - [[Medicine Cabinet]]s |
||
| + | |||
| + | <br> |
||
| + | |||
| + | === Mini Sewers === |
||
| + | [[File:Mini Sewers.jpg|thumb|none|Mini Sewers|320x180px]] |
||
| + | (Note: The Mini Sewers are hidden at the base of the mountains behind Culcast Radio. It is in the mountains the the left of the cave, and once you're back there it is easy to spot.) |
||
| + | |||
| + | The Mini Sewers contain: |
||
| + | * 8 - [[Locker]]s |
||
| + | * 2 - [[Locker|Double Lockers]] |
||
| + | * 0 - [[Refrigerator]] |
||
| + | * 0 - [[Toilet]]s |
||
| + | * 1 - [[Medicine Cabinet]]s |
||
| + | |||
| + | <br> |
||
| + | |||
| + | === Swamp House === |
||
| + | [[File:Swamp House.jpg|thumb|none|Swamp House|320x180px]]The Swamp House contains: |
||
| + | * 4 - [[Locker]]s |
||
| + | * 3 - [[Locker|Double Lockers]] |
||
| + | * 1 - [[Refrigerator]] |
||
| + | * 1 - [[Toilet]]s |
||
| + | * 1 - [[Medicine Cabinet]]s |
||
| + | |||
| + | <br> |
||
| + | |||
| + | === Culco Labs === |
||
| + | [[File:Culco Labs.jpg|thumb|none|Culco Labs|320x180px]]Culco Labs contains: |
||
| + | * 19 - [[Locker]]s |
||
| + | * 7- [[Locker|Double Lockers]] |
||
| + | * 3 - [[Refrigerator]] |
||
| + | * 1 - [[Toilet]]s |
||
| + | * 1 - [[Medicine Cabinet]]s |
||
| + | |||
| + | (Note: Culco Labs also has 2 smaller buildings right next to it)[[File:Culco Labs 1.jpg|thumb|none|Culco Labs Side Building 1|320x180px]]This building contains: |
||
| + | * 4 - [[Locker]]s |
||
| + | * 2- [[Locker|Double Lockers]] |
||
| + | * 0 - [[Refrigerator]] |
||
| + | * 0 - [[Toilet]]s |
||
| + | * 0 - [[Medicine Cabinet]]s |
||
| + | [[File:Culco Labs 2.jpg|thumb|none|Culco Labs Side Building 2|320x180px]]This building contains: |
||
| + | * 4 - [[Locker]]s |
||
| + | * 0- [[Locker|Double Lockers]] |
||
| + | * 1 - [[Refrigerator]] |
||
| + | * 3 - [[Toilet]]s |
||
| + | * 1 - [[Medicine Cabinet]]s |
||
| + | |||
| + | <br> |
||
| + | |||
| + | === Survival Station === |
||
| + | [[File:Survival Station.jpg|thumb|none|Survival Station|320x180px]]The Survival Station contains: |
||
| + | * 3 - [[Locker]]s |
||
| + | * 4 - [[Locker|Double Lockers]] |
||
| + | * 1 - [[Refrigerator]] |
||
| + | * 0 - [[Toilet]]s |
||
| + | * 1 - [[Medicine Cabinet]]s |
||
| + | |||
| + | <br> |
||
| + | |||
| + | === Culco Rec === |
||
| + | [[File:Basketball Court.jpg|thumb|none|Basketball Courts|320x180px]] |
||
| + | (Note: This building is usually looted alongside Culcast Rec) |
||
| + | |||
| + | The Basketball Courts contain: |
||
| + | * 4 - [[Locker]]s |
||
| + | * 0 - [[Locker|Double Lockers]] |
||
| + | * 1 - [[Refrigerator]] |
||
| + | * 2 - [[Toilet]]s |
||
| + | * 1 - [[Medicine Cabinet]]s |
||
| + | |||
| + | <br> |
||
| + | |||
| + | === Bath House === |
||
| + | [[File:Culcast Rec.jpg|thumb|none|Culcast Rec|320x180px]] |
||
| + | (Note: This building is usually looted alongside the Basketball Courts) |
||
| + | |||
| + | Culcast Rec contains: |
||
| + | * 4 - [[Locker]]s |
||
| + | * 0 - [[Locker|Double Lockers]] |
||
| + | * 1 - [[Refrigerator]] |
||
| + | * 0 - [[Toilet]]s |
||
| + | * 1 - [[Medicine Cabinet]]s |
||
| + | |||
| + | <br> |
||
| + | |||
| + | === Culco Gas North === |
||
| + | [[File:Culco Gas North.jpg|thumb|none|Culco Gas North|320x180px]]Culco Gas North contains: |
||
| + | * 8 - [[Locker]]s |
||
| + | * 5 - [[Locker|Double Lockers]] |
||
| + | * 2 - [[Refrigerator]] |
||
| + | * 2 - [[Toilet]]s |
||
| + | * 1 - [[Medicine Cabinet]]s |
||
| + | |||
| + | [[Category:Maps| ]] |
||
Latest revision as of 15:53, 21 September 2018
While at first The Culling's map might seem large, once you understand it, it is not nearly as daunting. Learning the map is an important skill to have, as it will give you an advantage over your opponent.
Map Overview

Map Objects
Map Objects are objects that spawn around the island which are used for a large variety of things.
Crafting
Item Spawners
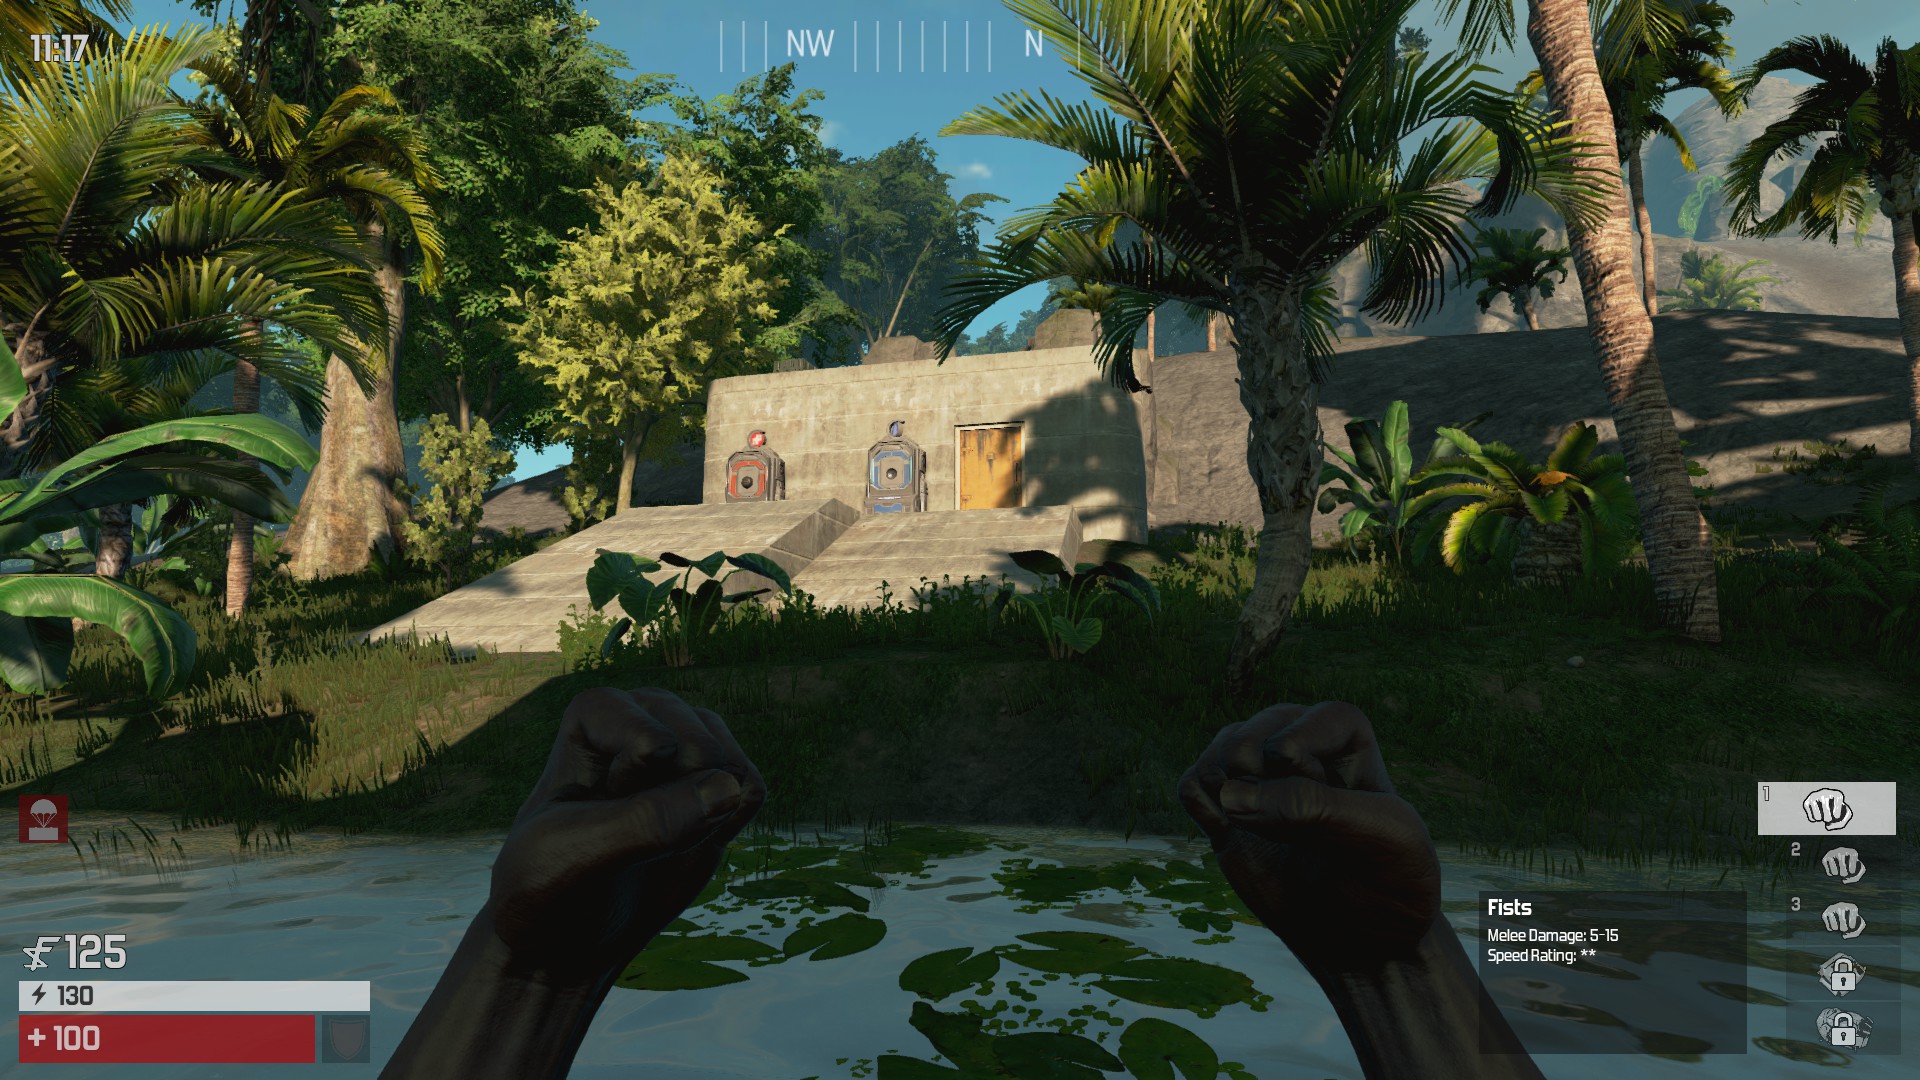
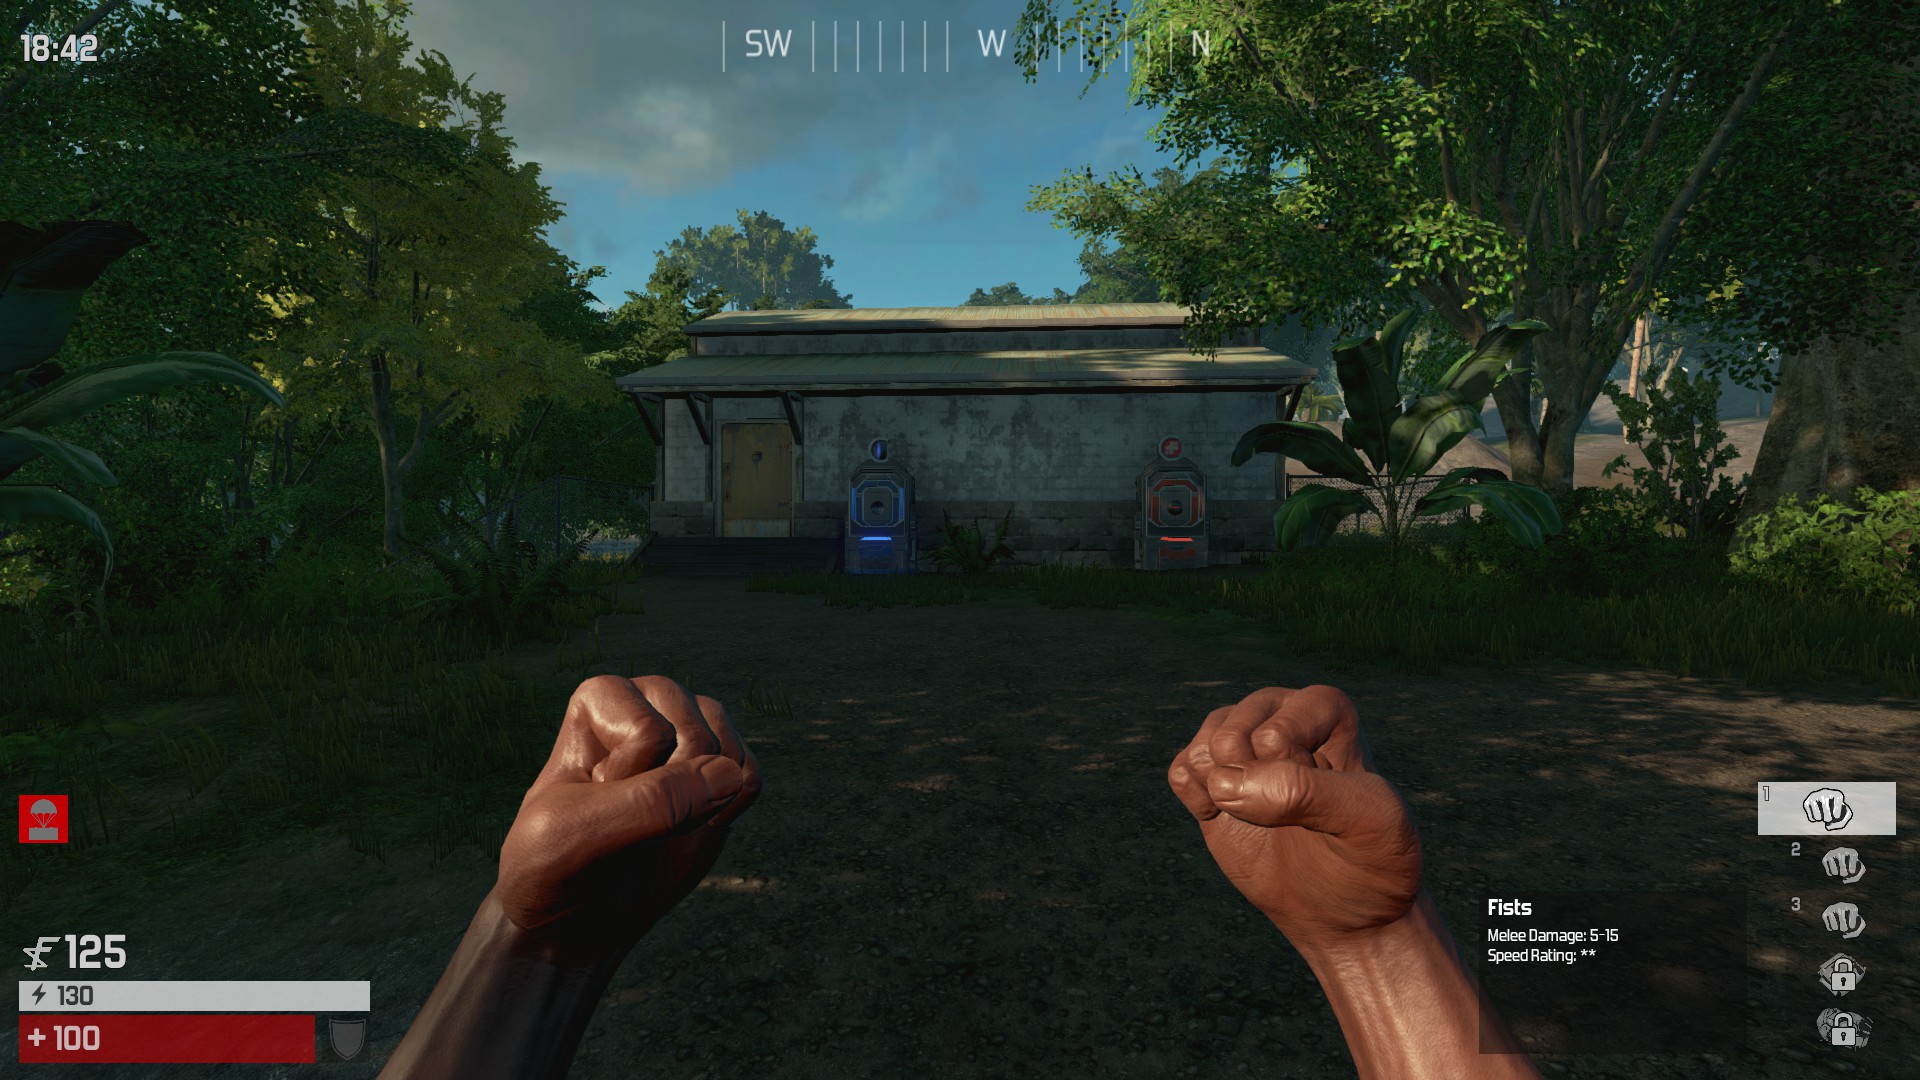
Recycle Station
Recycle Stations are blue machines at buildings that allow you to recycle Items and weapons and turn them into F.U.N.C.. The amount of F.U.N.C. you will be rewarded with depends on how good them item or weapon is. Just like the medical station, you have to look at the recycling station while using it. This along with it being very noisy for both you and other contestants makes you very vulnerable for sneak attacks.
Medical Station
Medical Stations are red machines at buildings that allow you to heal in exchange for F.U.N.C.. It will heal you 4 health for 1 F.U.N.C. at a rate of once per second. This makes it much faster than crafting Crafted Bandage heal, but is also much more expensive. Just like the recycle station, you have to look at the medical station while using it. This along with it being very noisy for both you and other contestants makes you very vulnerable for sneak attacks.
Airdrop Pad
Airdrop Pads are pads scattered around the island where you can call in your airdrop. They have predetermined spawn locations, and each location has a chance to spawn each game. Airdrops will take 45 second to land (15 seconds with Load Dropper perk equipped), but they can be shot down early with a ranged weapon or by throwing an object at it. Contestants must also be wary of opponents when calling in their airdrop, because they are very noisy, which may attract other contestants who may want to steal it.
Trap Bridge
Trap Bridges are very dangerous bridges that hang very high up and connect two cliffs together. They are dangerous because the floors drop when they take damage, causing any contestants on them to fall from a great height, taking massive damage because of it. This allows other contestants to either knock their opponents off, or trap them in the middle which is the only solid ground on the bridge. Trap bridges however do have special airdrop pads on them as well, which will spawn contestants' airdrops to spawn directly overhead, allowing them to receive their airdrops extremely quickly. This however is a great risk, because if any opponents are nearby, they can hear the airdrop and come to trap them on the bridge.
Map Events
Map Events are random events that take place twice during the course of a match. The first event takes place at the 19:15 mark, while the second event doesn't occur until 13:00. These events are designed to draw players together to encourage fights and spice up the game play. These events take a few different forms, each with their own unique announcements and themes.
You can read more about them here.
Buildings
There are 19 Buildings in The Culling placed for our looting pleasure. Every building is vastly different, on both their appearances and lootable objects. Each building (besides the Mini Sewers) will have at least 1 Recycle Station and Med Station. This list will start at the most northern building, and move clockwise until all buildings have been listed.
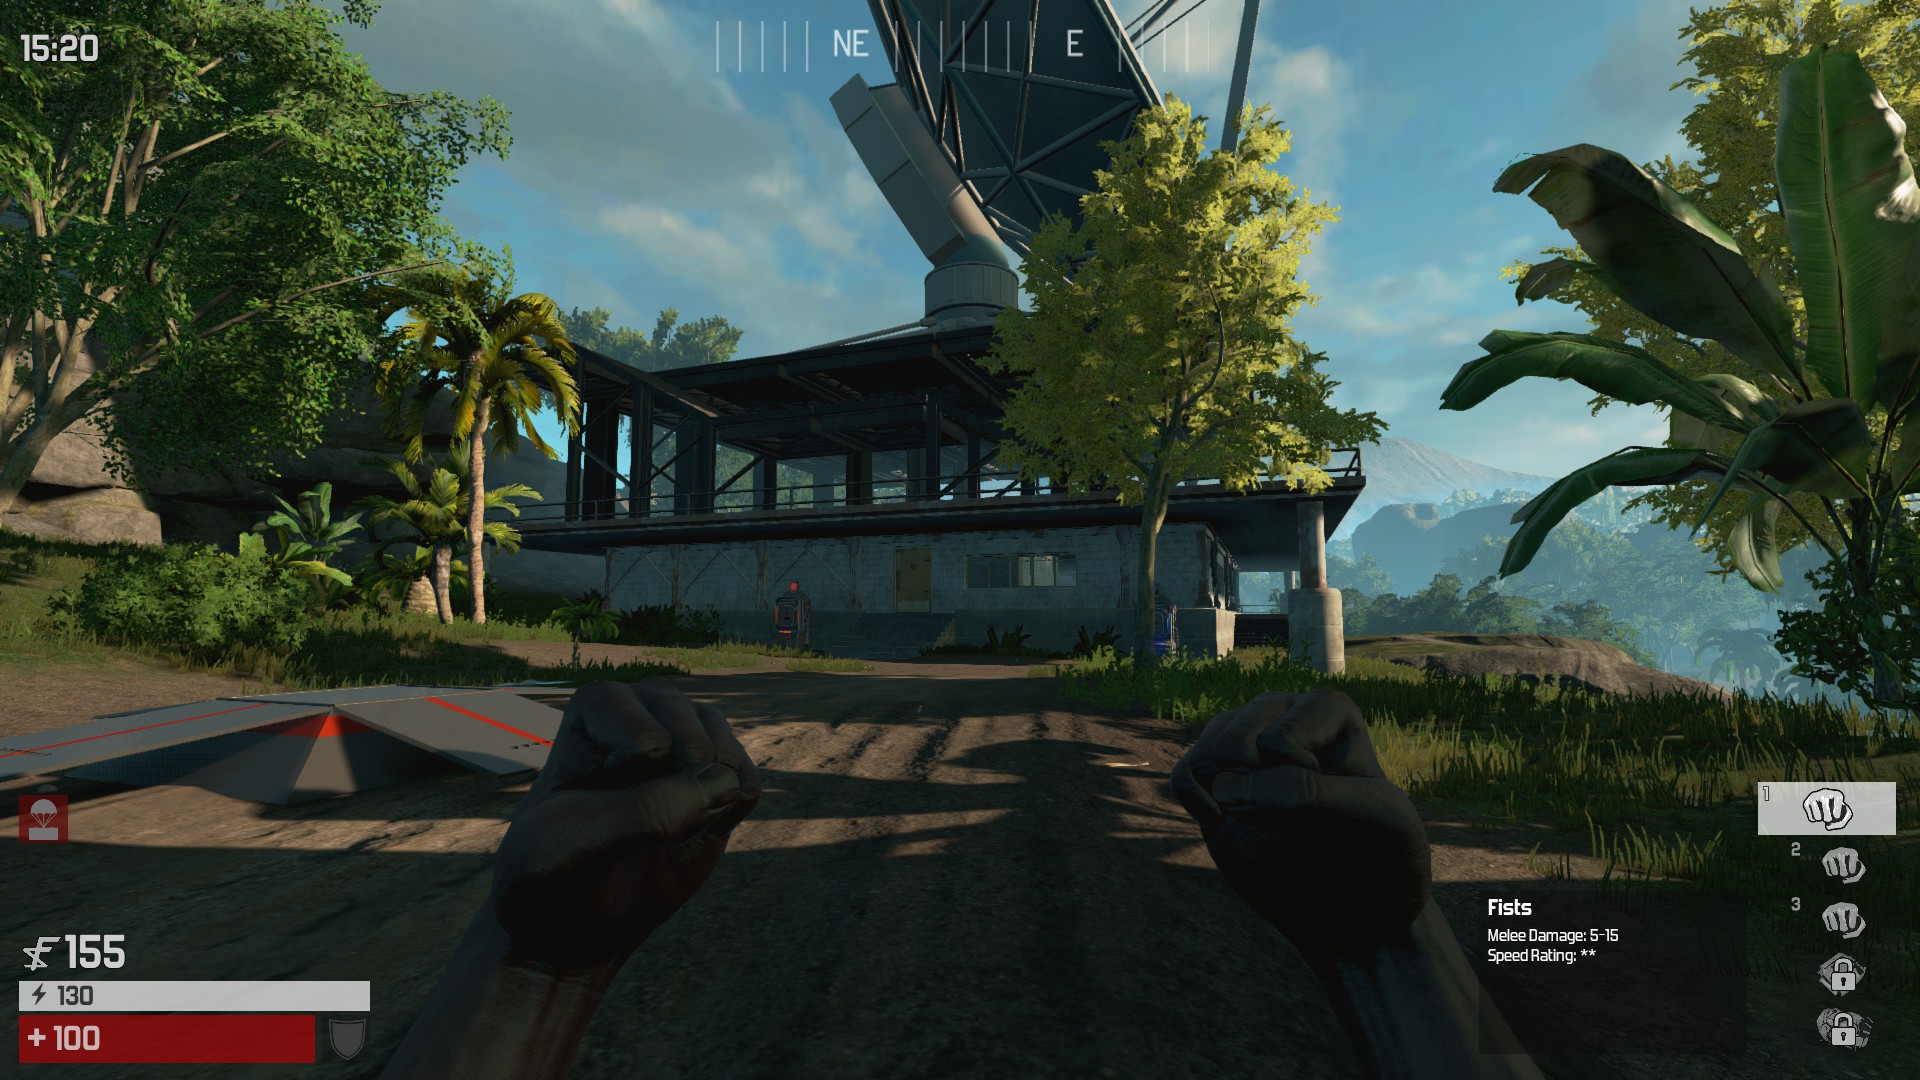
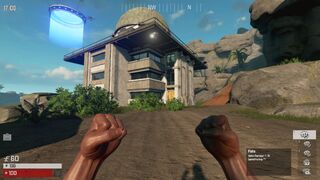
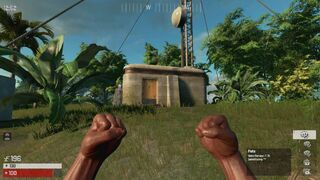
Culcast Sat Com
Culcast Sat Com
(Note: Lockers in Culcast Sat Com have a reduced spawn rate due to the high amount of lockers)
Culcast Sat Com contains:
- 26 - Lockers
- 10 - Double Lockers
- 1 - Refrigerator
- 6 - Toilets
- 1 - Medicine Cabinets
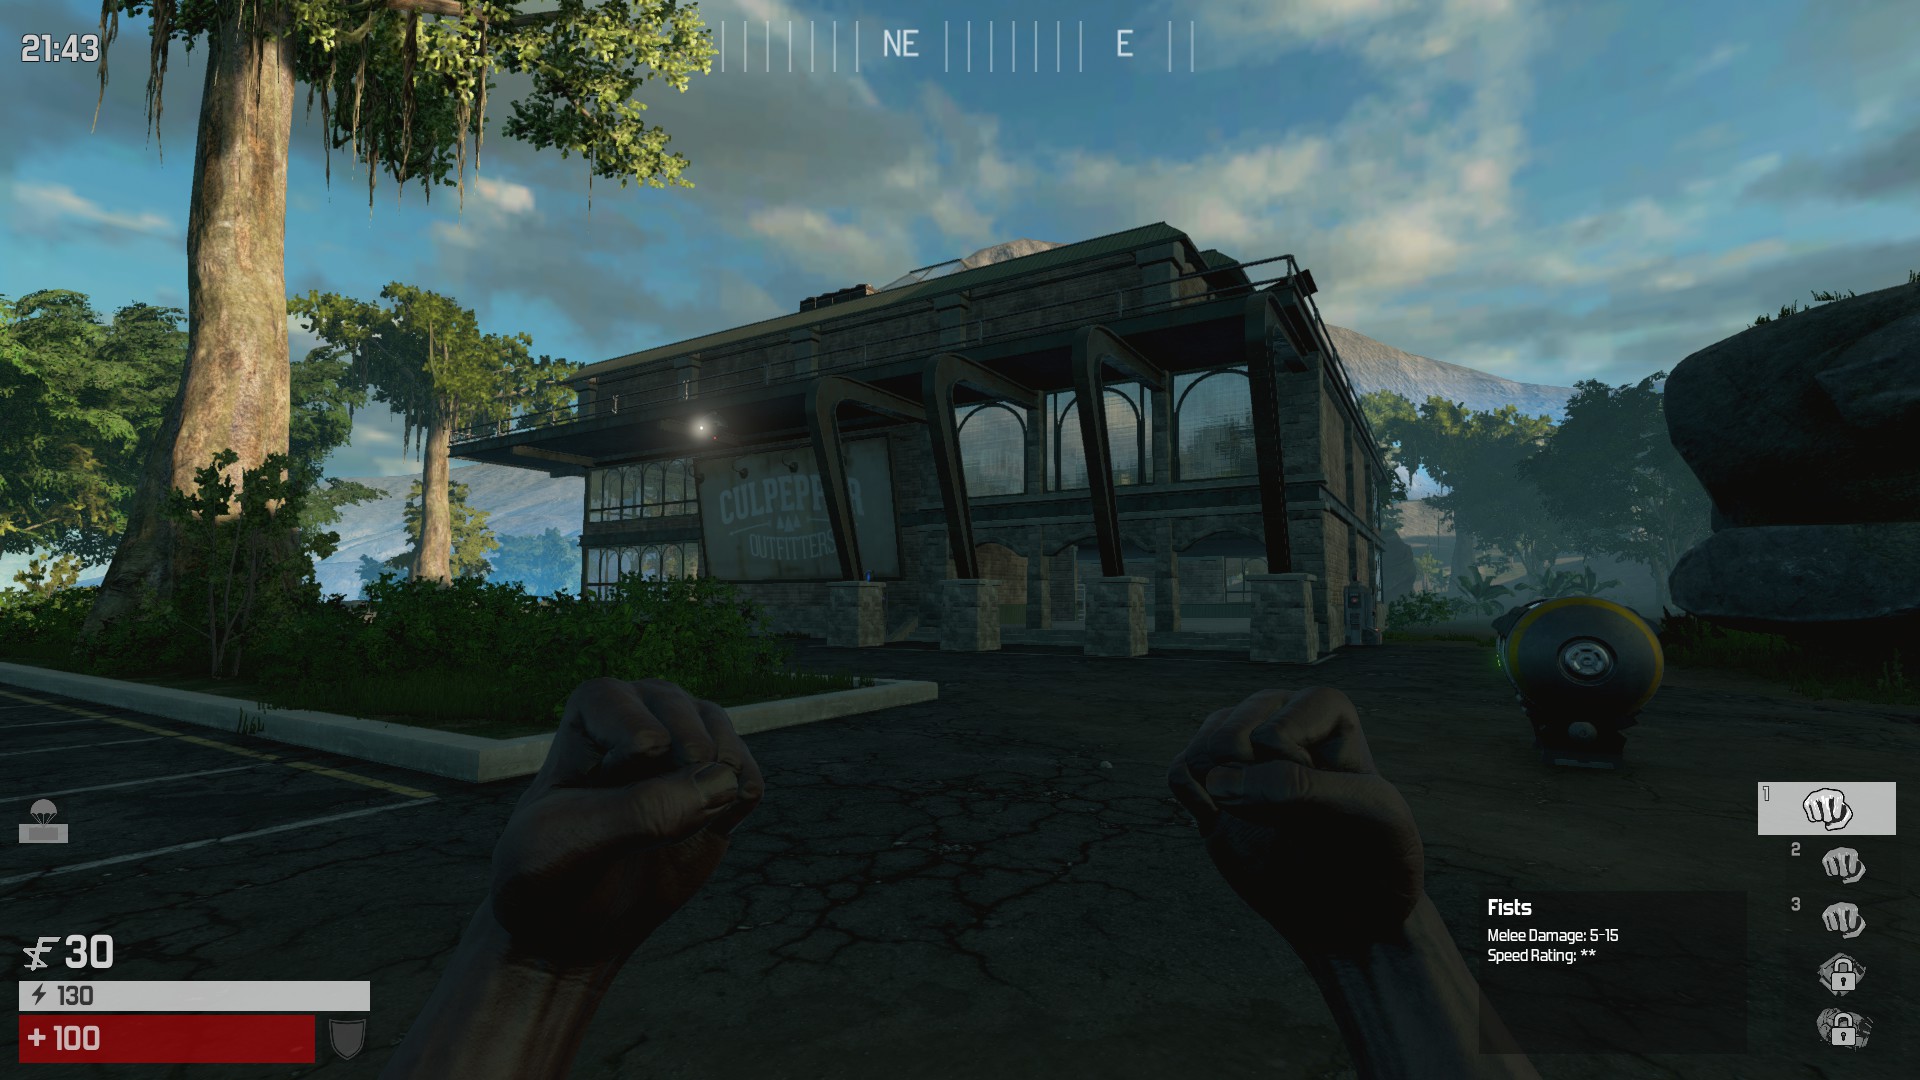
Culpepper Outfitters
Culpepper Outfitters
Culpepper Outfitters contains:
- 9 - Lockers
- 17 - Double Lockers
- 3 - Refrigerator
- 2 - Toilets
- 3 - Medicine Cabinets
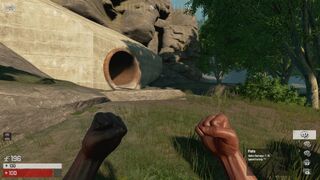
Tunnels (or Long Hall)

Tunnels
The Tunnels contains:
- 10 - Lockers
- 7 - Double Lockers
- 0 - Refrigerator
- 0 - Toilets
- 0 - Medicine Cabinets
Water Treatment North

Water Treatment North
Water Treatment North contains:
- 13 - Lockers
- 7 - Double Lockers
- 0 - Refrigerator
- 0 - Toilets
- 3 - Medicine Cabinets
Water Treatment South

Water Treatment South
Water Treatment South contains:
- 10 - Lockers
- 3 - Double Lockers
- 0 - Refrigerator
- 0 - Toilets
- 2 - Medicine Cabinets
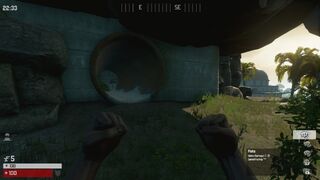
Sewers

Sewers
(Note: The Sewers have multiple gates along the length of it, which can be knocked down by hitting them. These are useful when running from an opponent. They can also be very deadly when paired Gas Tanks that spawn inside of the sewers, allowing you to trap your opponent in the gas.)
The Sewers contain:
- 7 - Lockers
- 3 - Double Lockers
- 2 - Refrigerator
- 0 - Toilets
- 2 - Medicine Cabinets
Culcast Weather and Observation

Culcast Weather and Observation
Culcast Weather and Observation contains:
- 20 - Lockers
- 0 - Double Lockers
- 0 - Refrigerator
- 0 - Toilets
- 1 - Medicine Cabinets
Culco Gas East

Culco Gas East
Culco Gas East contains:
- 13 - Lockers
- 3 - Double Lockers
- 1 - Refrigerator
- 1 - Toilets
- 1 - Medicine Cabinets
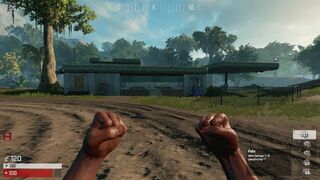
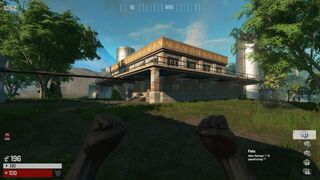
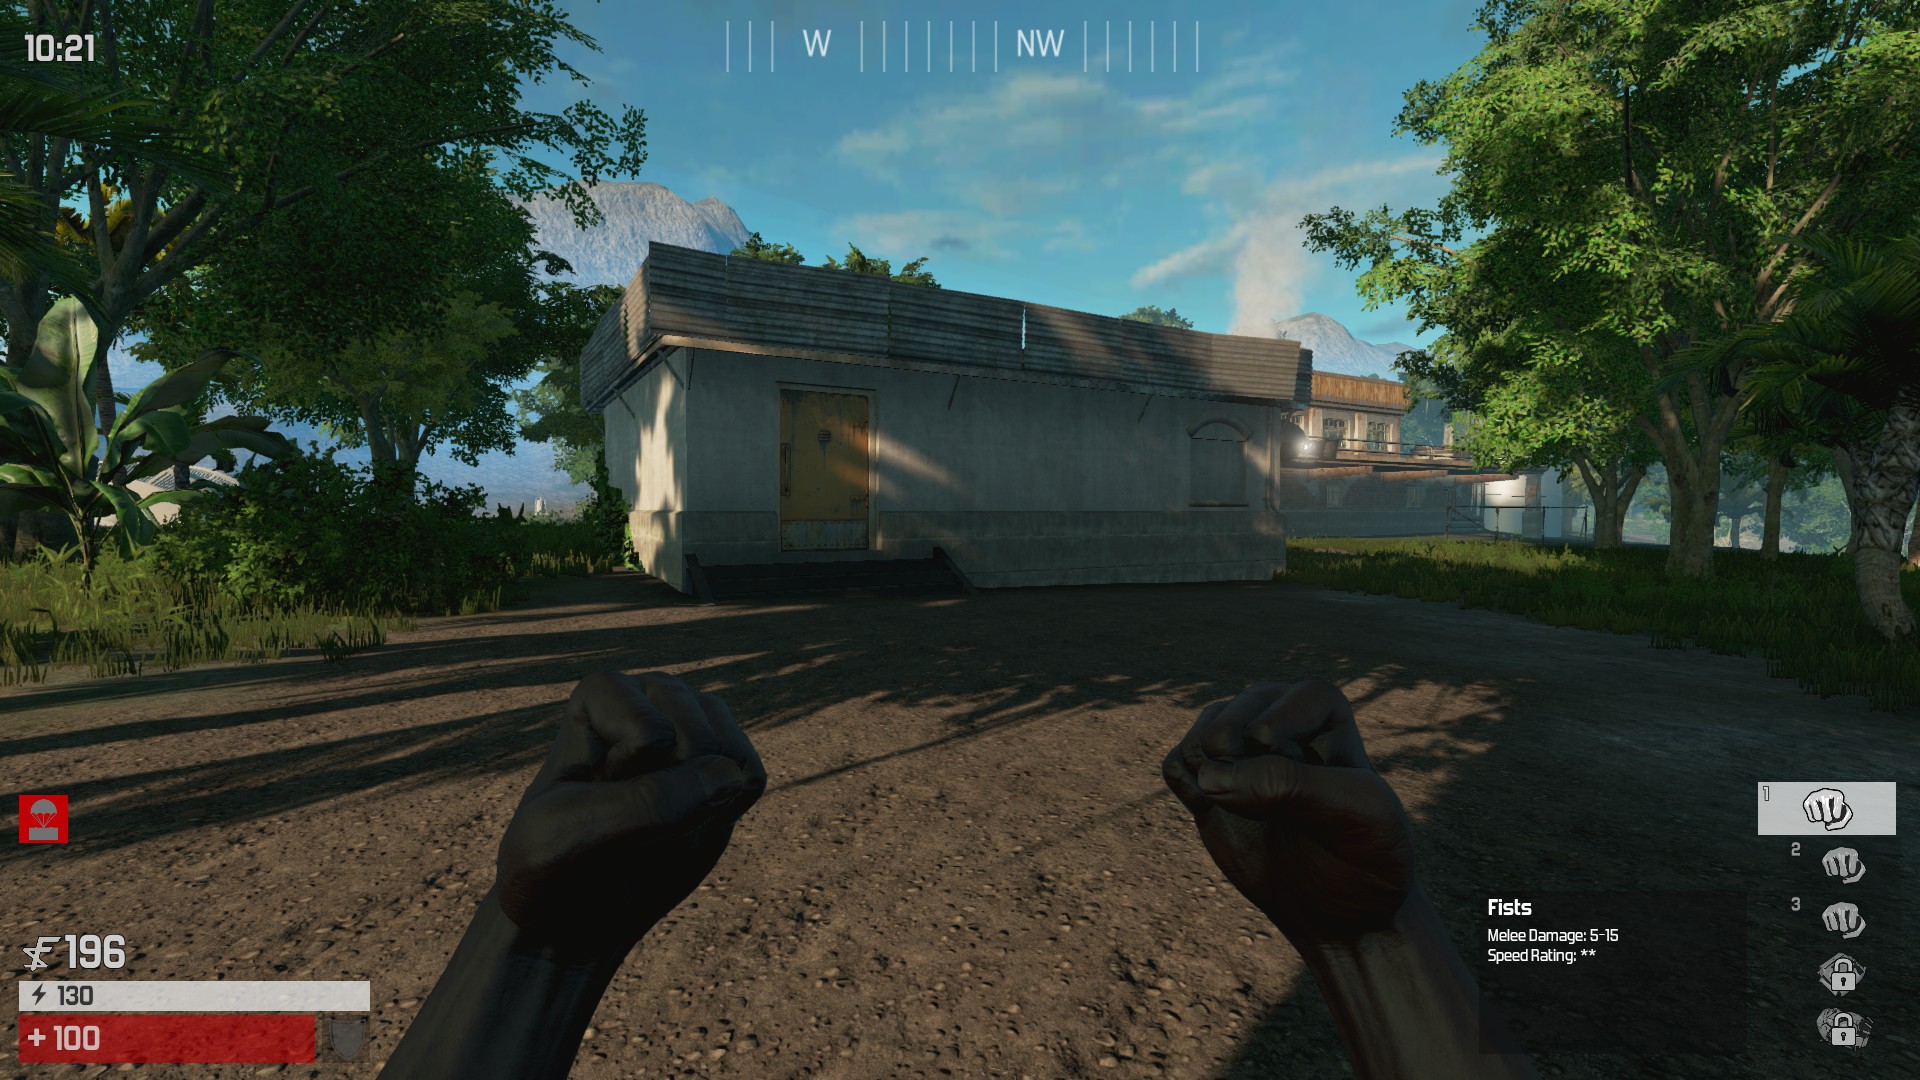
Outpost
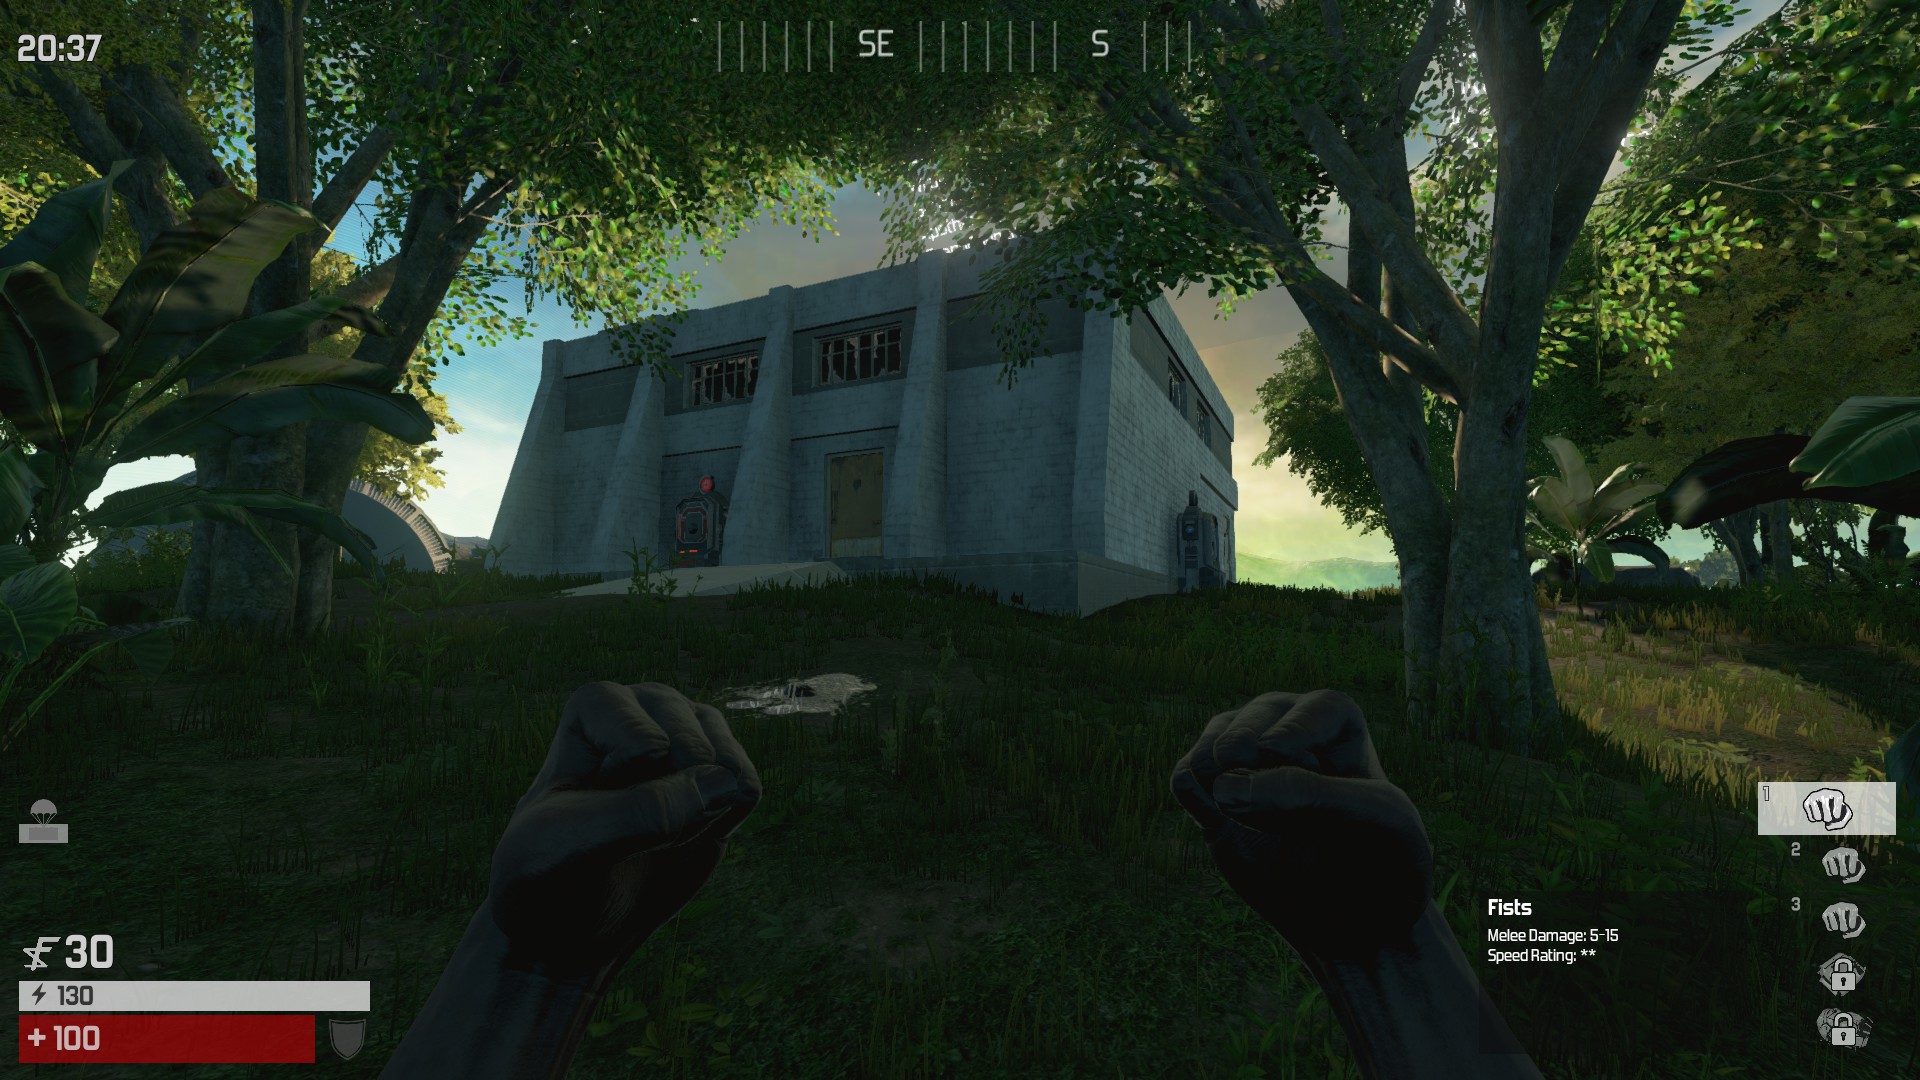

New Building
Outpost contains:
- 13 - Lockers
- 4 - Double Lockers
- 1 - Refrigerator
- 0 - Toilets
- 2 - Medicine Cabinets
Pump House

Pump House
(Note: Lockers in the Pump House have an increased spawn rate due to the small amount of lockers)
The Pump House contains:
- 3 - Lockers
- 3 - Double Lockers
- 1 - Refrigerator
- 2 - Toilets
- 1 - Medicine Cabinets
Culco Airport

Culco Airport
Culco Airport contains:
- 15- Lockers
- 13 - Double Lockers
- 1 - Refrigerator
- 5 - Toilets
- 2 - Medicine Cabinets
(Note: the airport also has 3 miniature buildings along the runway. These buildings have a 100% chance to spawn an item crate in one of them.)
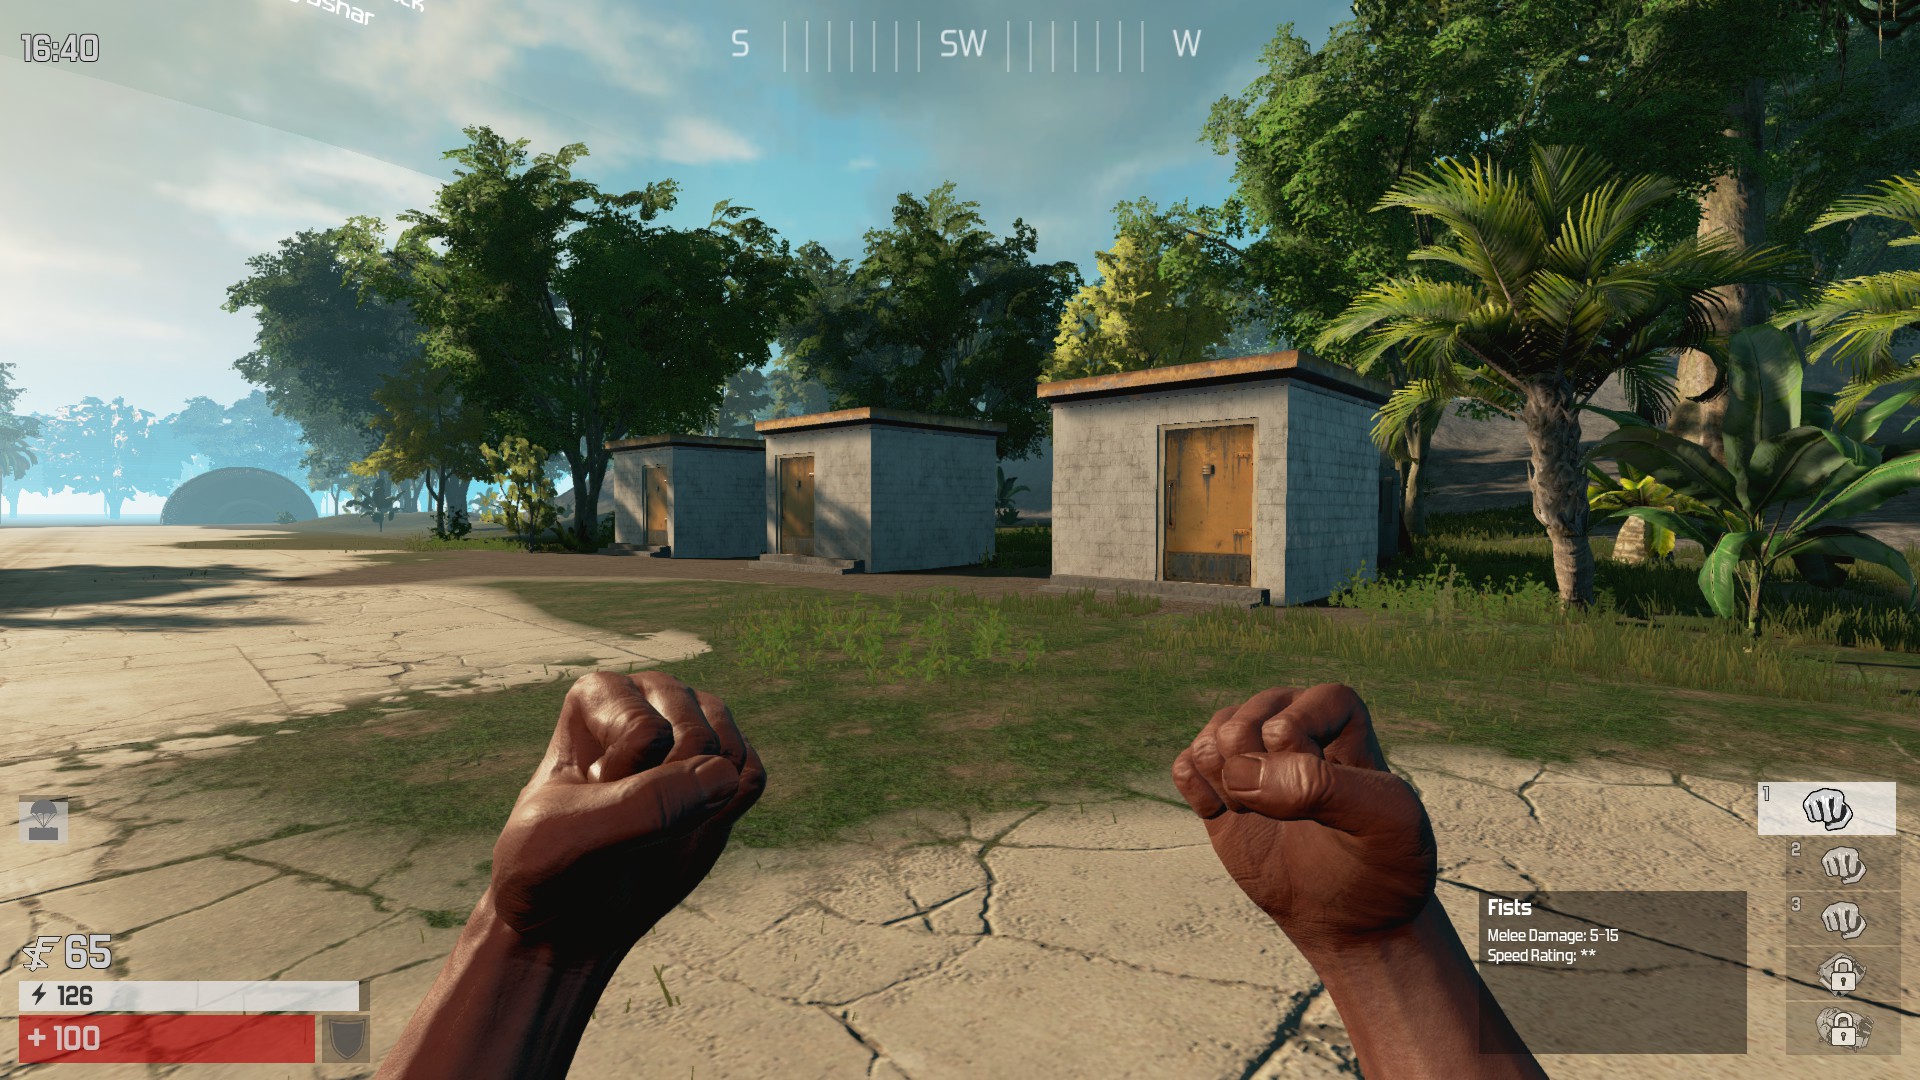

Airport Mini Buildings
Culcast Radio

Culcast Radio
(Note: Lockers in Culcast Radio have an increased spawn rate due to the small amount of lockers.)
Culcast Radio contains:
- 3 - Lockers
- 3 - Double Lockers
- 1 - Refrigerator
- 0 - Toilets
- 1 - Medicine Cabinets
Mini Sewers

Mini Sewers
(Note: The Mini Sewers are hidden at the base of the mountains behind Culcast Radio. It is in the mountains the the left of the cave, and once you're back there it is easy to spot.)
The Mini Sewers contain:
- 8 - Lockers
- 2 - Double Lockers
- 0 - Refrigerator
- 0 - Toilets
- 1 - Medicine Cabinets
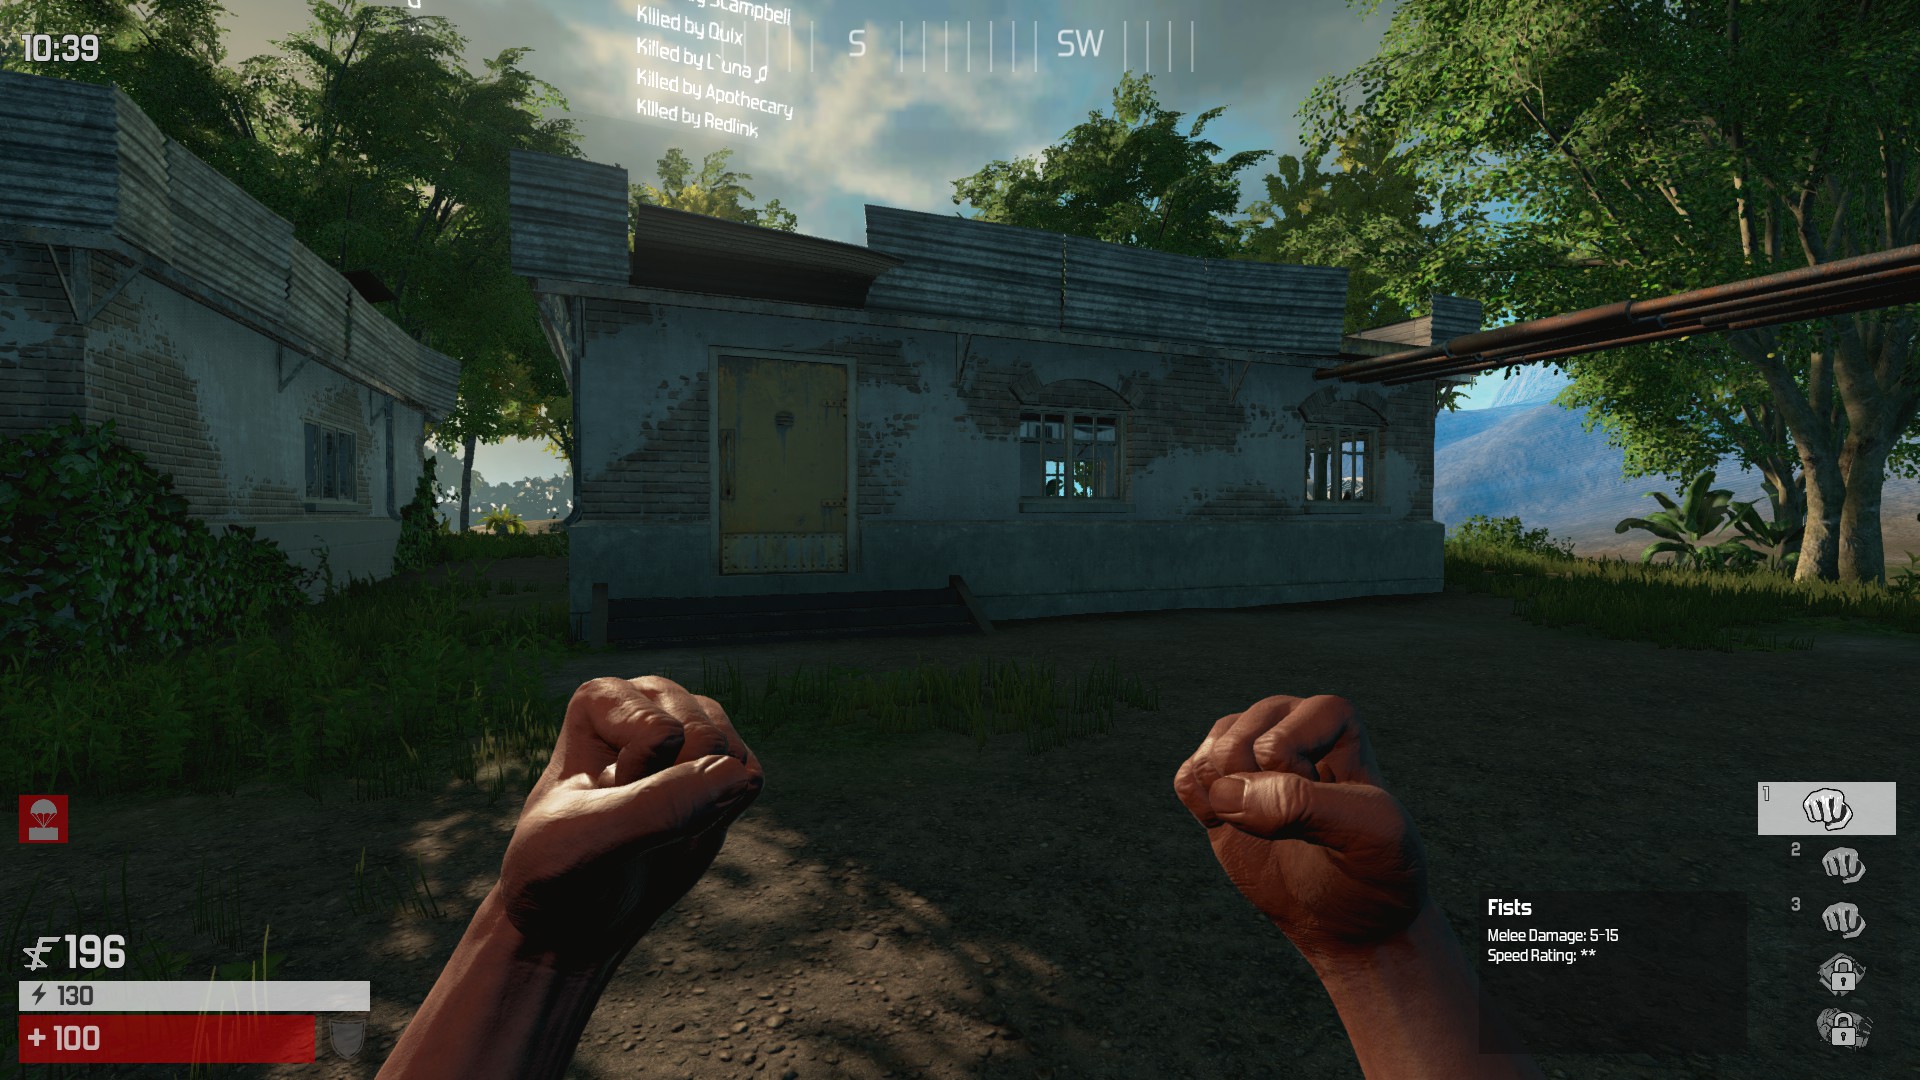
Swamp House


Swamp House
The Swamp House contains:
- 4 - Lockers
- 3 - Double Lockers
- 1 - Refrigerator
- 1 - Toilets
- 1 - Medicine Cabinets
Culco Labs

Culco Labs
Culco Labs contains:
- 19 - Lockers
- 7- Double Lockers
- 3 - Refrigerator
- 1 - Toilets
- 1 - Medicine Cabinets
(Note: Culco Labs also has 2 smaller buildings right next to it)

Culco Labs Side Building 1
This building contains:
- 4 - Lockers
- 2- Double Lockers
- 0 - Refrigerator
- 0 - Toilets
- 0 - Medicine Cabinets
Culco Labs Side Building 2
This building contains:
- 4 - Lockers
- 0- Double Lockers
- 1 - Refrigerator
- 3 - Toilets
- 1 - Medicine Cabinets
Survival Station

Survival Station
The Survival Station contains:
- 3 - Lockers
- 4 - Double Lockers
- 1 - Refrigerator
- 0 - Toilets
- 1 - Medicine Cabinets
Culco Rec

Basketball Courts
(Note: This building is usually looted alongside Culcast Rec)
The Basketball Courts contain:
- 4 - Lockers
- 0 - Double Lockers
- 1 - Refrigerator
- 2 - Toilets
- 1 - Medicine Cabinets
Bath House
Culcast Rec
(Note: This building is usually looted alongside the Basketball Courts)
Culcast Rec contains:
- 4 - Lockers
- 0 - Double Lockers
- 1 - Refrigerator
- 0 - Toilets
- 1 - Medicine Cabinets
Culco Gas North


Culco Gas North
Culco Gas North contains:
- 8 - Lockers
- 5 - Double Lockers
- 2 - Refrigerator
- 2 - Toilets
- 1 - Medicine Cabinets